
It’s that time of year again at Sarika & Sage, and our sleigh bells are ringing with just the right amount of eco-inspired yuletide decoration ideas to get you inspired! So, cue the gingerbread men and string up your Christmas tree with a thoughtful touch: it’s time to celebrate the holidays with our eco-friendly Christmas cheer!
Speaking of sleigh bells – have you seen this month’s Christmas challenge? Our theme is a celebration of Christmas and all things festive! For a chance to win 1 of 2 $100 vouchers, all you have to do is follow Sarika and Sage, post a photo of your Christmas creation to Instagram, and tag your image with #createwithsarika! Entries need to be posted by December the 25th, and winners will be drawn on Christmas day.
Now on with the show!
This month, we are digging deep into our treasure trove of Mother Nature’s gifts, with the ultimate sustainable Christmas decoration ideas to enlighten your home with.
Keen to and adopt a more eco-minded way of celebrating Christmas?
Say hello to Rudolph with 17 ideas for a crafty christmas. Action-packed, family-friendly crafts that will not only save you money: but will busy you and your littlies right up until Christmas morning!
DIY AIR-DRY CLAY GIFT TAGS:


Images by @a.playful.day
Keen to create your very own personalised adornments with your unique stamp on it? Our air-dry clay gift tag recipe is the perfect plant-friendly choice for unique gift packaging design!
What You’ll Need:
1 cup of baking soda, 1/2 cup of cornflour, just under 3/4 cups of water, twine, leaves and flowers
Instructions:
Simply combine the ingredients in a saucepan over medium heat until it resembles mashed potato. Allow it to cool in a damp tea towel and then knead until smooth. Roll the clay out and imprint with leaves/flowers and cut gift tag pieces to your desired size. Use a skewer to poke a whole. Allow them to dry and then attach twine.
DRIFTWOOD CHRISTMAS TREE:


Are you a fan of the rustic and whimsy? Fancy a wall decoration with some holiday flair? Why not create a driftwood Christmas tree to accentuate your wall? Inspired by Geneva Vanderzeil, the driftwood Christmas tree is the perfect choice!
What You’ll Need:
Sticks or driftwood, rope, fairy lights, hook, optional- nature items, baubles, or other decorations.
Instructions:
Start by laying your branches out on the ground to achieve a triangular shape. Measure out two pieces of rope, longer than the entire length of your tree, ensuring extra for tying. Tie loops at the start of each piece of rope for hanging purposes. Lay the rope along the length sides of the branch triangle and knot the branches in place. Hang your branch Christmas tree and decorate with fairy lights and other Christmasy items!
WINTER WONDERLAND LANTERN:
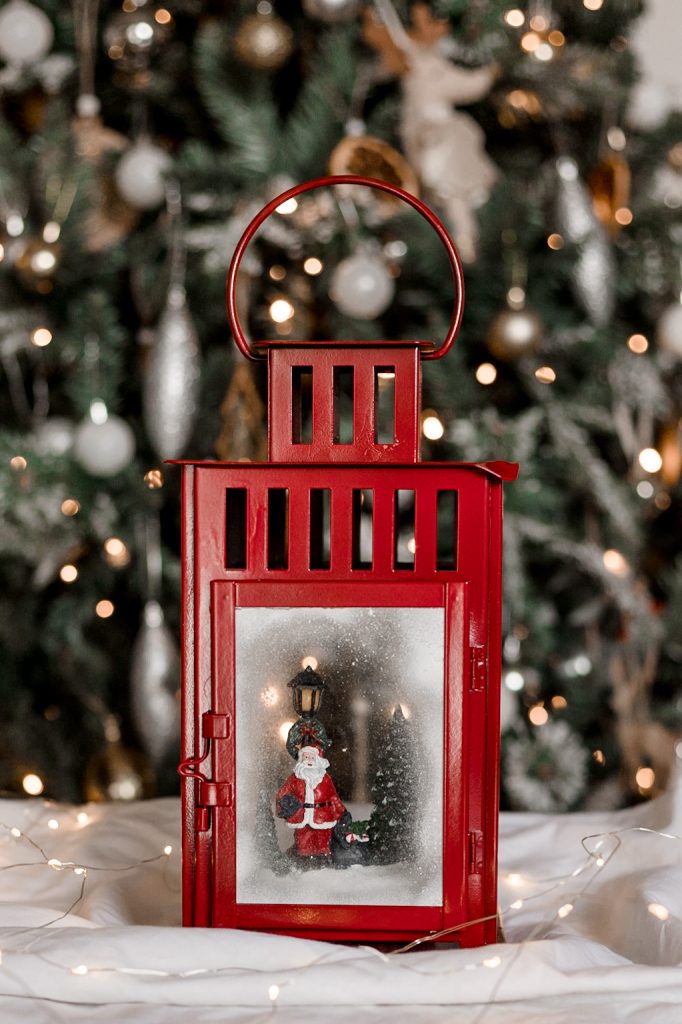
There is nothing more magical than a candle lantern. This nostalgic decorative item, repurposed with non-toxic paint, is the perfect addition to decorating with magical yuletide cheer!
What You’ll Need:
Washing cloth, repurposed candle lantern, non-toxic natural paints, non-toxic snow spray, krylon crystal clear, Christmas scene figurines (either DIY or store-bought)
To create these little gems, clean all surfaces and remove the glass. Paint the lantern frame with your non-toxic desired colour. Allow it to dry. For the snow effect, use an enviro-friendly snow spray followed by using Krylon crystal clear to seal the snow. Place a Christmas scene inside the lantern, this can be bought from a $2 shop or you can make your own.
ADVENT SPIRAL:
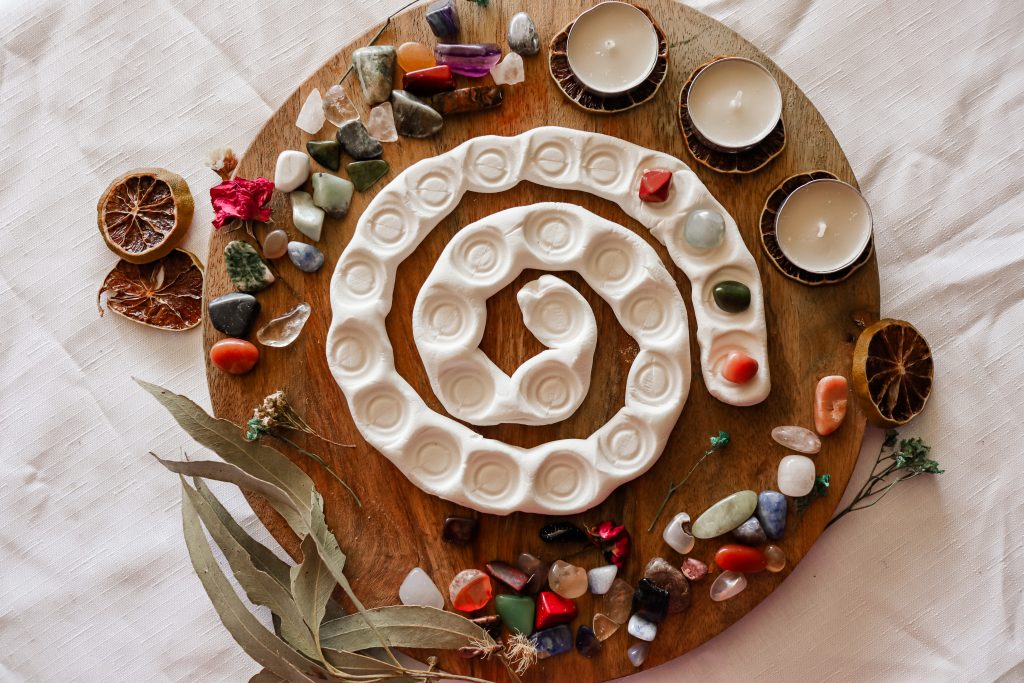
Keen to count down the days to Christmas in a more soulful way, using nature’s unique gifts? Craft this unique Advent Spiral to add some gemstone sparkle to your Christmas table.
What You’ll Need:
1 cup of baking soda, 1/2 cup of cornflour, just under 3/4 cups of water
Instructions:
Simply combine the ingredients in a saucepan over medium heat until it resembles mashed potato. Allow it to cool in a damp tea towel and then knead until smooth. Start rolling the dough into a long worm shape and flatten slightly on top. Create 25 round imprints for your counters by using the end of a taper candle or something that will create small circles. Allow to air dry naturally or bake in an oven set to 90 degrees celsius for 1-1.5 hours until hardened. Countdown to Christmas by adding a gemstone each day of December.
GUMNUT FELTED ELVES:

Get your creative juices flowing over this festive period with these adorable needle-felted gumnut elves. These can be hung in your tree, used as a table setting decoration, or added onto gifts for that special Christmas touch!
What You Need:
Your chosen colours of merino felt roving, felting needle and foam pad, rubber finger thimbles (optional for beginners), gumnuts, glue gun
Instructions:
Start this gorgeous project by pulling apart a section of your merino wool roving. Resting on your foam pad, slowly roll the roving into itself while poking the felt with your needle. Keep rolling the felt into a ball gradually while stabbing through to secure and bind the fibres together. The more you stab the felt with your needle, the firmer your ball will get. Once happy with the shape, glue gun into the gumnut. Follow the same procedure with your elf hat. Remembering that you have control over the shape and firmness. Let the needle be the guide as you wrap and stab.
CHRISTMAS CENTERPIECE:

Let your festive table shine with this boho-inspired Christmas Centrepiece. Cast in nature’s foliage, this forest-inspired decoration is truly fairy-tale worthy.
You Will Need:
A pretty bowl, a marker pen, cardboard larger than the bowl, a skewer stick, scissors, dried flora, biodegradable glitter, a candle (preferably inside a small glass for fire safety reasons)
Instructions:
Onto the cardboard, trace around your bowl and cut out a few millimeters wider than your traced line. Then poke through the middle of your circle and cut out a smaller centre circle, leaving you with a ring shape 3-5cm wide. Place your cardboard ring over your bowl to check the fit and then using your skewer stick, pole holes all around the ring. Proceed to poke stems of dried flowers/leaves onto each hole making sure they are on an outward lean (away from the centre). If you would like, sprinkle your candle top with biodegradable glitter and place it gently into the centre of your bowl (preferably inside a glass or jar to prevent your dried flowers from catching alight and never leave a candle burning unattended). Place on your table centre.
CHRISTMAS HOT TODDY:

Keen to serve up a dose of festive cheer? Relax and rewind by blending up some Christmas hot toddy drinks. Tried and tested to tantalise your taste buds, blend the all-natural ingredients below, top with some dried orange rinds and you’ll be singing along to your favourite Christmas tunes in no time!
What You’ll Need: (serves 2)
350mls water, 1 x heaped teaspoon of cardamom pods, 1x heaped teaspoon of cloves, 3 x star anise stars, 2x cinnamon sticks, 250mls orange juice, 1.5 tablespoons of honey, your choice of gin. Serves 2.
ECO STAR TOPPER:


Images by @heartofblooms_ and @wild.little.whimsy
Top your Christmas tree with the beaty of mother nature. Tap into her lair to create festive magic with our unique DIY Eco star toppers for a natural, rustic aesthetic.
You Will Need:
5 large sticks (all roughly a similar size and length), twine, scissors, biodegradable glitter
Instructions:
Start by talking positioning your 5 sticks into the shape of a star. Then using a short piece of twine tie the two stick ends of each star point together with just a simple knot to help hold it all in place for now. Now to secure fully, wrap twine 2-3cm wide around the simple knots on your star points and tie off with a double knot. You may like to wrap the inner crossover stick sections together too. If you would like, finish off with bio glitter, dollop on some craft glue and sprinkle away! Create a loop with twine at the top point of your star to hang. Place on your mantle, hang on your wall or pop it on the front door for all to see!
CHRISTMAS REED DIFFUSERS:
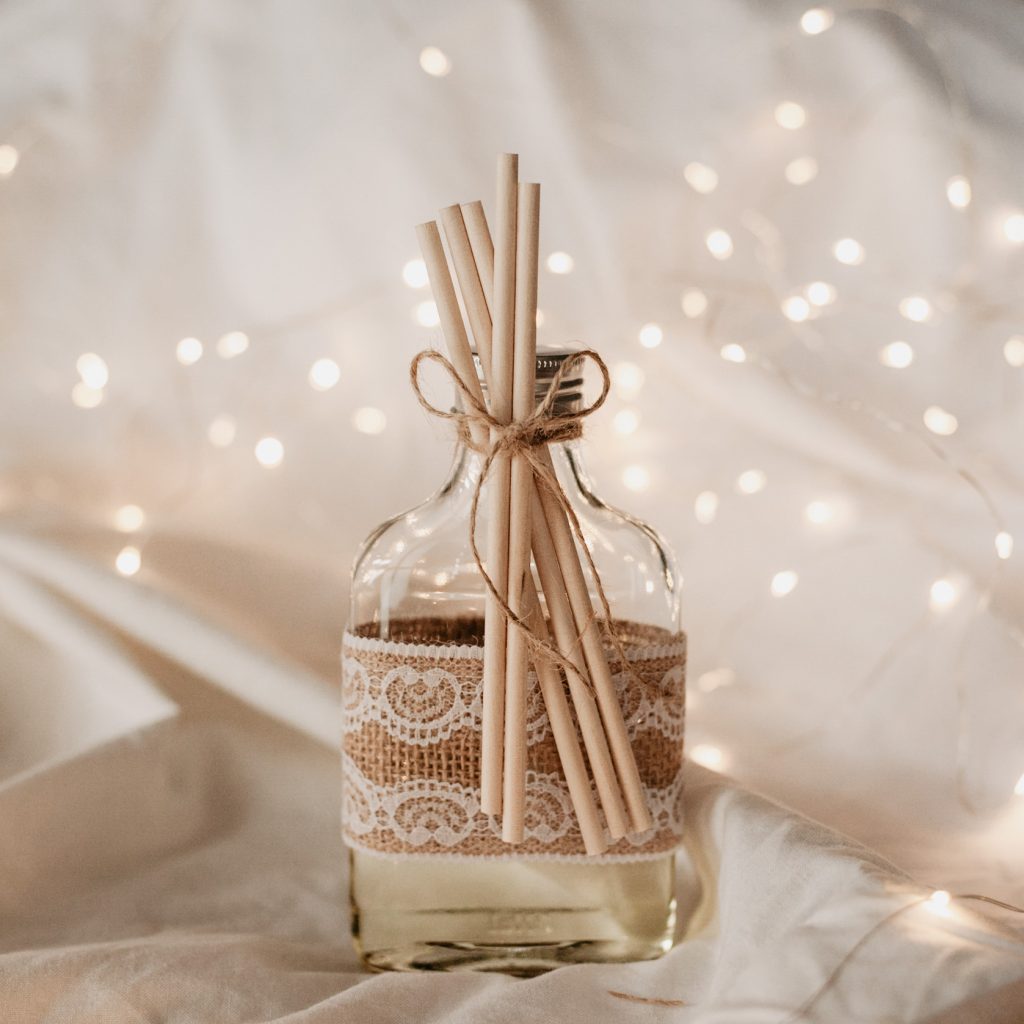
Keen to create a soothing, plant-friendly aromatherapy gift for yourself or for others? Create these Christmas Reed Diffusers and relax and breathe in the splendour of nature’s gifts.
What You’ll Need:
Clear oil, such as: almond or glycerine, essential oils such as: orange, nutmeg, pine, bottle, craft sticks, twine, hemp wrap band with lace detail
Instructions:
Pour 1/4 cup of oil into your bottle, add a combination of the 3 oils (20 drops in total). Wrap bottle with hemp band, and tie skewers to the bottle with a bow of twine.
HOMEMADE HAND CREAM GIFT:
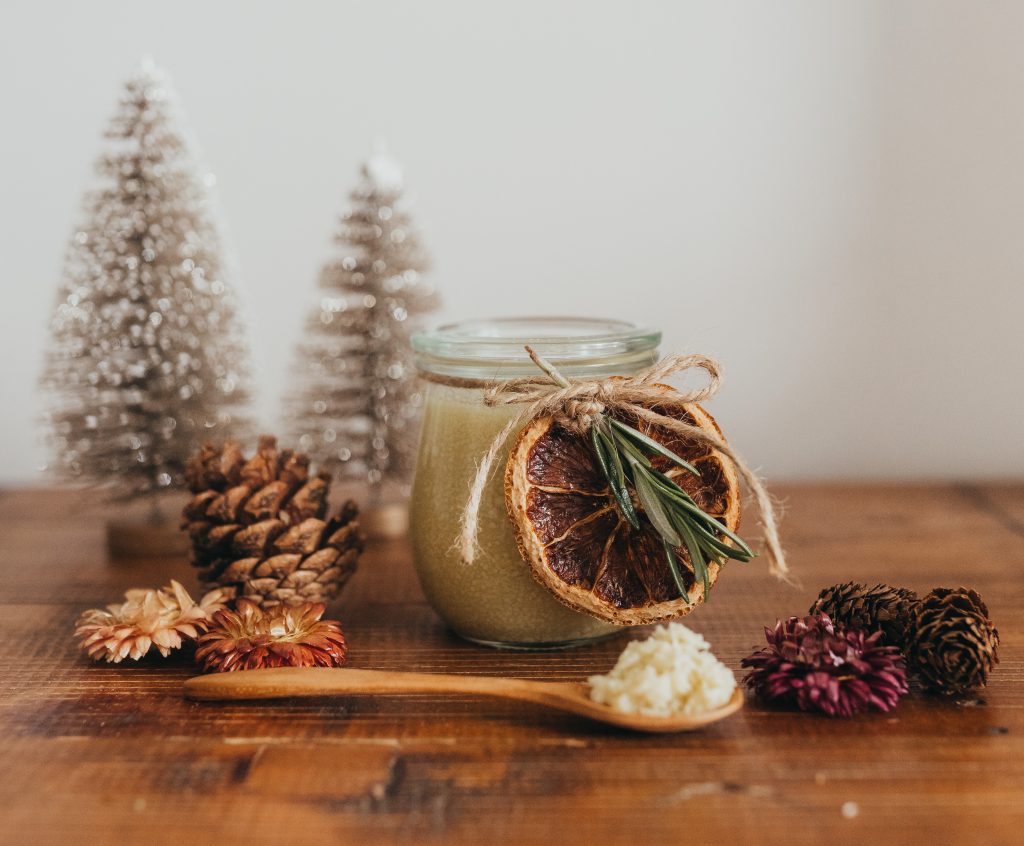
Create little pots of Christmas splendour while breeding an environment of ultimate self-care with our homemade hand creams. Blended with shea butter, cocoa butter and hemp seed oil, these crafty natural pots in renewable jars will add a mindful touch to your eco-friendly Christmas.
What You’ll Need:
1/2 cup shea butter, 1/4 cup cocoa butter, 1/4 cup hemp seed oil
Instructions:
Melt down the butters and oil. Let it harden in the freezer for roughly 20 minutes. Once the mixture is solid but not too hard you will need to whip it for 5 minutes until it becomes fluffy. Spoon it into a jar and adorn with a dried orange rind and some twine. Keeps for 3 months.
FABRIC WRAPPED GIFTS:
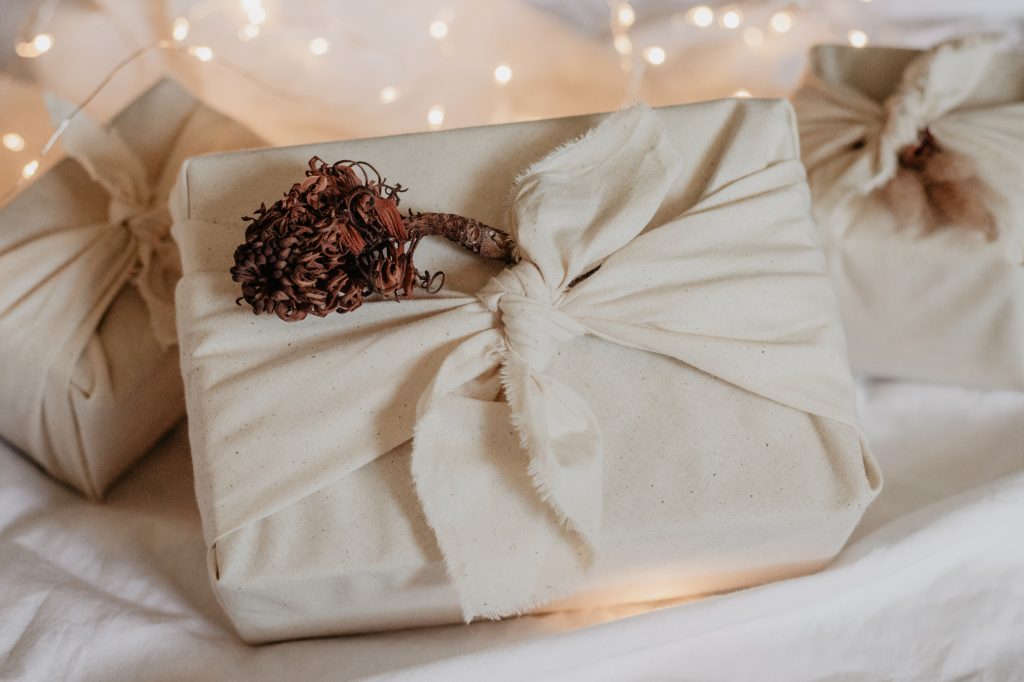
Keen to give a unique gift covered in fabric? You could wrap your gifts in plain calico or try dying some fabric to use instead of paper and make the earth smile.
What You’ll Need:
Calico fabric, blooms
PRESSED-LEAF CHRISTMAS CARDS:

Keen to create some Christmas cards with a touch of greenery? Try our pressed-leaf Christmas card craft to gift to friends and family: to
sprinkle up some cheer!
What You’ll Need:
Bio glitter, leaves, card stock, glue
Instructions:
Use your pressed leaves to create Christmas trees on your cards. Glue down some bio glitter.
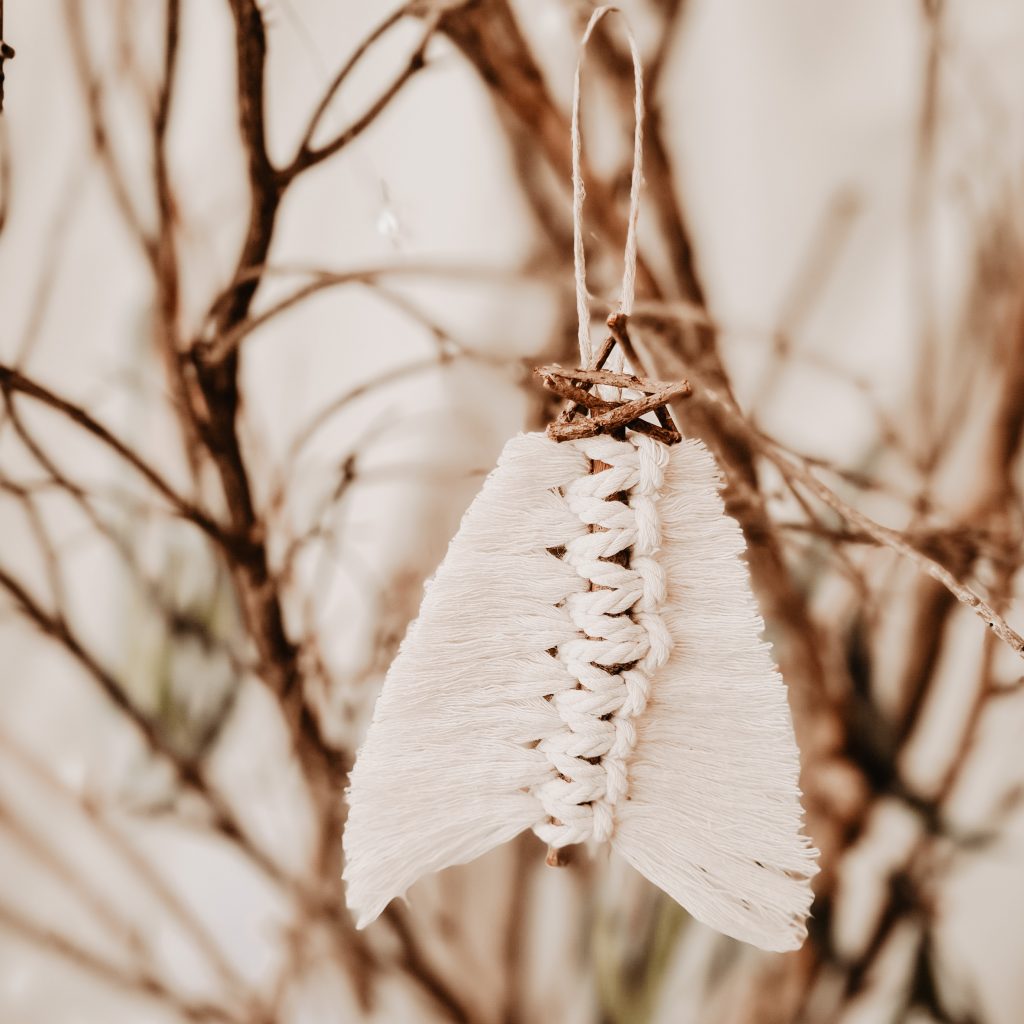
MACRAME ANGEL:

Hear the angels sing with this beautiful handmade macrame angel adornment to finish off your tree!
What You’ll Need:
3mm macramé string for: Arms (20cm), Legs (50cm), Wings (90cm)
4mm macramé string pulled apart for: Hair 8 ropes (18cm)
3mm Macramé string brushed and pulled apart for: Angel Dess 16 ropes (26cm)
20mm bead and 60cm 2mm rope
Instructions:
Step 1: Thread rope through bead
Step 2: Push through hair into the top loop. Tie off a knot to secure hair in place at the top and bottom.
Step 3: Place arm string over the top of the leg string (bent in half).
Step 4: Fold top of legs over the arms and pull the legs through the loop.
Step 5: Prepare the wings by looping the string together and tying off in the middle. Trim unwanted rope.
Step 6: Feed wings through (under and over) legs. Keep arms underneath and pull legs to tighten together.
Step 7: Attach head piece to the legs & arms with a knot.
Step 8: lay over dress, crossing over at the shoulders.
Step 9: Use rope to tie the dress together


CANDY CANE HOT CHOCOLATE BOMBS:

Keen to create a delicious all-natural, plant-friendly snack for your family, to eat around the Christmas tree? Try our Candy Cane Hot Chocolate bombs to bring on your Christmas cheer. And don’t forget to save one for Santa!
What You’ll Need:
Cadbury Milk Chocolate Melts, Mini Marshmallows, Candy Canes, spoons, moulds – I’ve used baby food freezer moulds, brown paper and ribbons for wrapping
Instructions:
Melt chocolate in a glass bowl over a saucepan of hot water. Once chocolate is smooth and runny pour it into moulds.
Break up candy cane to mix through the chocolate. Then add marshmallows to the top of each mould. Add a spoon in each mixture and place in the fridge for 2 hours. Either wrap for gifting or heat some milk and stir through. Enjoy!
MACRAME CHRISTMAS TREE:
Keep your macramé angel company with this simple DIY macramé tree decoration: for a match made in yuletide heaven!
What You’ll Need:
A few straight sticks, any size Macramé cord (we used 6mm), glue gun, sticks for star or anything you like, spray starch
Instructions:
Cut a few pieces of string (25cm). Fold two pieces in half. Place one of the loops under the stick. Take the looped end of the other strand and push the ends of the strand that’s under the twig, through the loop. Now thread the ends of that strand through the loop that’s under the twig. Pull both strands tight. Repeat until you are happy with the fullness of your tree. Brush out the Macramé cord and spray with starch. Iron flat and use sharp scissors to cut the shape of your tree. Hot glue together a twig star or anything of your liking, Glue to the top along with some string and you are done! Hang on your tree and enjoy.
GINGERBREAD COOKIES:

Satisfy your sweet tooth with these whimsical Gingerbread cookie treats! Gather your family in the kitchen to create cute gingerbread men, cute cottages, hearts, and stars: to delight hungry tummies!
What You’ll Need:
1 egg yolk, 125 grams butter (chopped), 1/2 cup golden syrup, 1/2 cup brown sugar, 2 and ¾ cup plain flour, 1 tsp bicarbonate of soda, sifted, 1 tbs ground ginger, 1 tbs ground clove, 1tbs ground nutmeg. Icing- 1 egg white, 1/2 tsp lemon juice, 1 and 1 half cup pure icing sugar, sifted
Making your dough:
*In a small saucepan on the lowest heat setting combine butter, golden syrup, and sugar
*Once melted remove from heat and whisk in your egg yolk
*in a separate bowl, combine dry ingredients
*fold through your butter mixture
*refrigerate your dough for 1hour
Prepare Icing:
*Mix ingredients and refrigerate until ready to use
Baking Instructions:
*Preheat oven to 180°C or 160°C fan-forced
*Grease baking tray
*Roll out dough and cut into shapes for baking
*Bake for 15 minutes
*Let cool and then decorate
Here’s some more fun facts about Sarika and Sage!
- Our products are locally made in Victoria, Australia
- Our eco-friendly mission is to make eco-friendly craft and organic products to educate and inspire little minds to care about their environment
- Our products are all made locally in Koo Wee Rup, Victoria.
Follow us on Instagram for more crafty inspo @sarikaandsage
If you like our 17 ideas for a crafty christmas, you might also want to read last years Xmas blog- A Crafty Christmas.