It’s Christmas time again at Sarika & Sage, and we are jumping with joy to share our top 10 Christmas crafts for this year! With quick and easy projects for the kids, or more complex crafts for parents, we’re certain we have that right amount of fun crafts to get you in the holiday spirit! Now it’s time to make a hot cocoa and get to planning which of our craft ideas you’re going to begin with first!
Speaking of Christmas joy- our Christmas challenge is back and you could win! Our theme is a celebration of Christmas and all things festive! For a chance to win a $100 voucher, all you have to do is follow Sarika and Sage, post a photo of your Christmas creation to Instagram, and tag your image with #createwithsarika! Entries need to be posted by December the 25th, and winners will be drawn on Christmas Day.
Say hello to our top 10 Christmas crafts that were sure you’ll be inspired by!
DIY Clay Ornaments
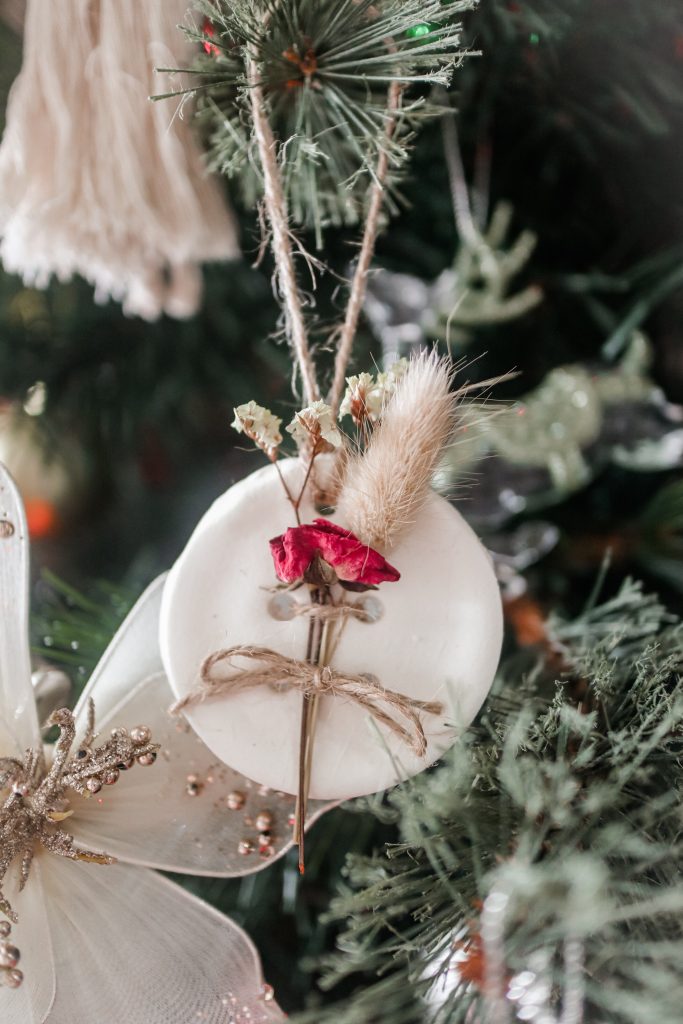
What you’ll need:
- 1 cup of baking soda
- 1/2 cup of cornflour
- Just under 3/4 cups of water
- Twine
- Dried botanicals
Directions:
- Combine the baking soda, cornflour and water in a saucepan over medium heat, stirring until it resembles mashed potatoes.
- Allow it to cool in a damp tea towel and then knead until smooth.
- Roll the clay out and cut out discs using a small glass cup.
- Use a metal straw to cut out 5 holes and allow discs to dry.
- Weave twine through holes (at the back of the disc, the twine will make an X), fastening the flowers into place.
SANTA HAND DECORATIONS
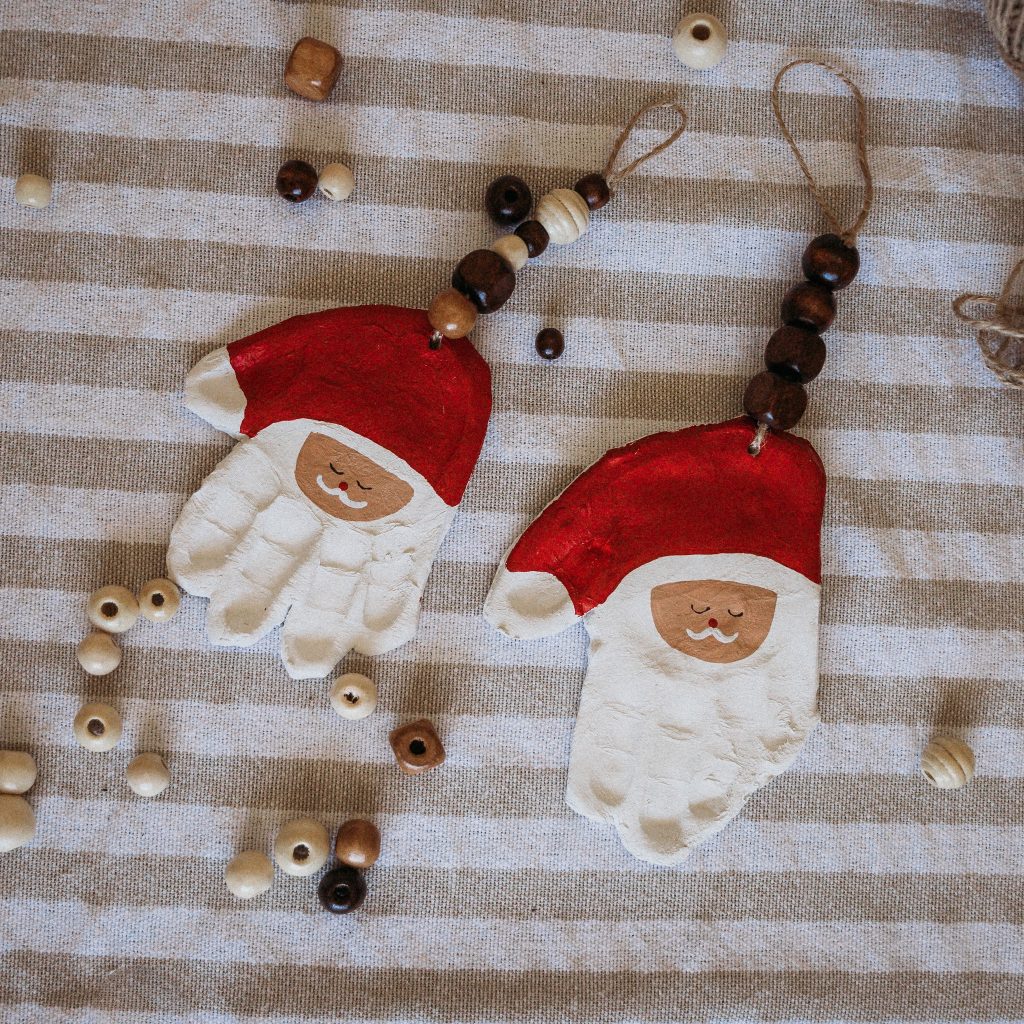
What you’ll need:
- White air dry clay (or use the recipe above)
- Clean little hands
- A knife
- A lead pencil
- Red, white, tan and black paint
- Fine paint brushes
- Twine
- Wooden beads (optional)
- Wooden kebab stick
- Rolling pin
Directions:
- Roll out your clay to about 5ml thick
- Press in little hands to create an imprint
- Make a whole for your twine and the base of the hand
- Cut out imprints with a knife and leave to dry (24 hours)
- Mark out hat and face for painting
- Paint and decorate
- Thread twine through hole and decorate with your wooden beads tie off at the end in a loop
- Don’t forget to write the child’s name and the year on the back to create a lifelong keepsake
- Use them for gift tags, presents or tree decorations
REPURPOSED BAUBLES
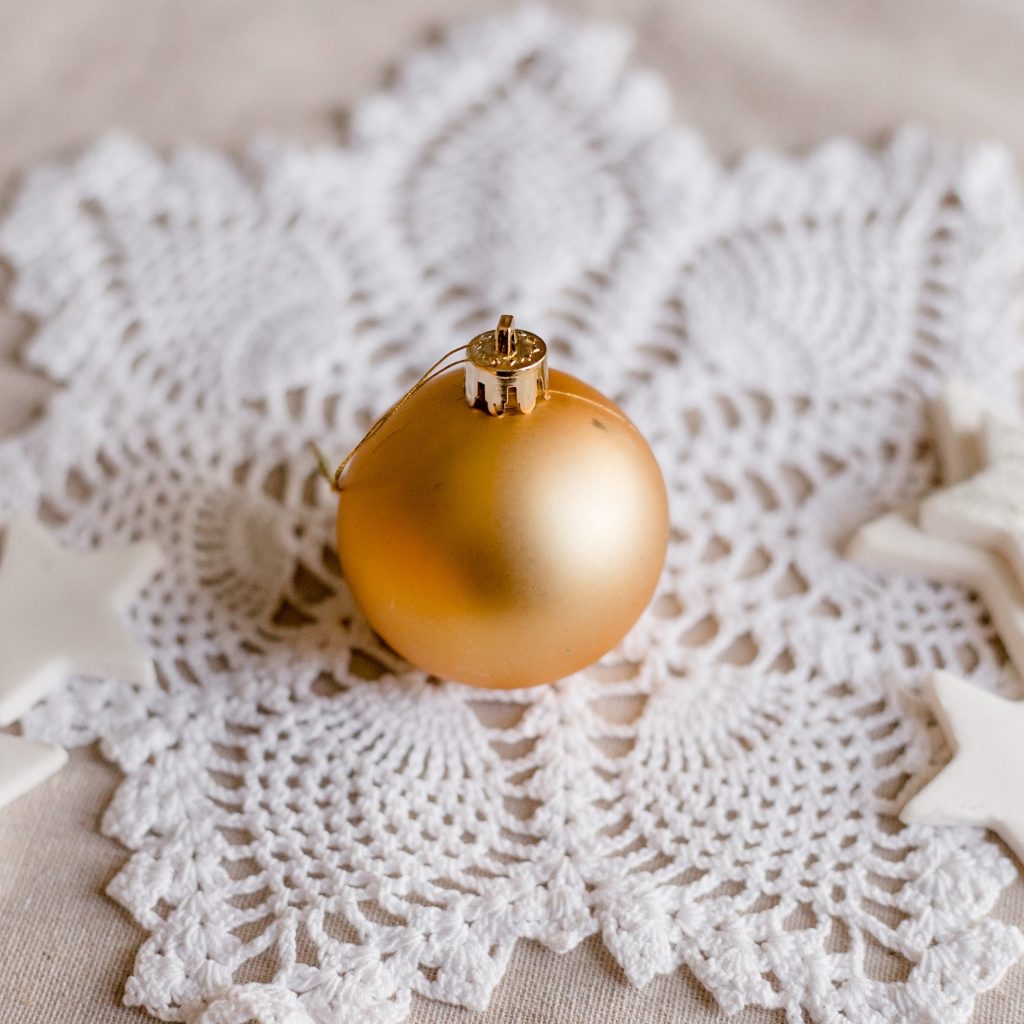
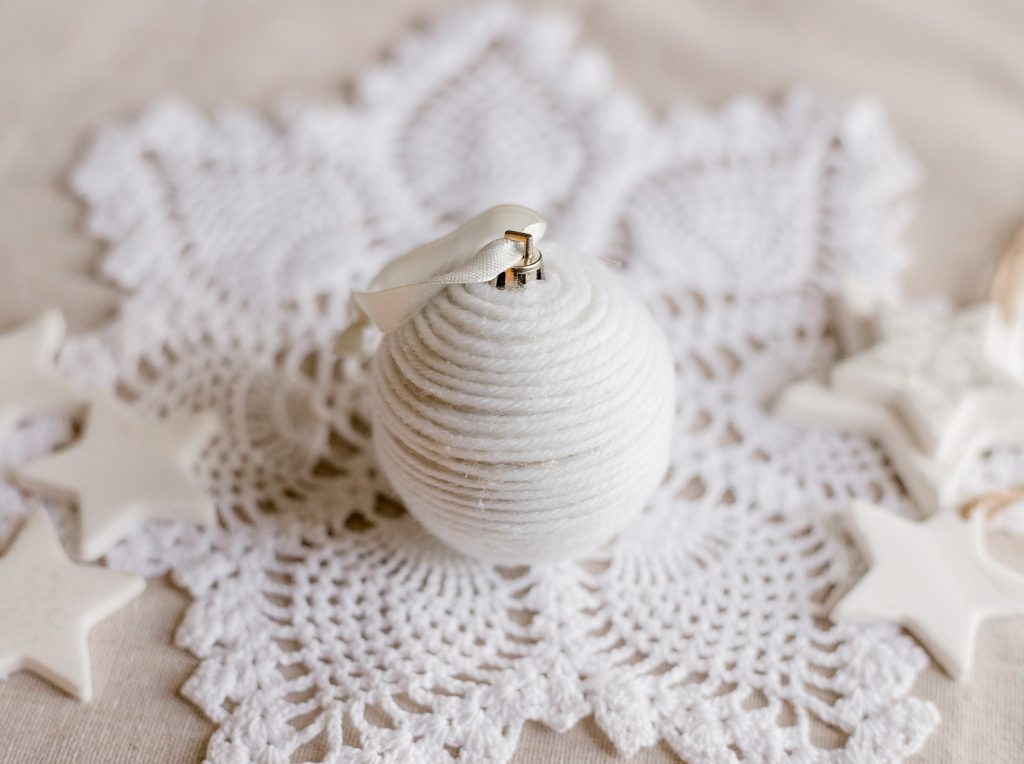
What you’ll need:
- Christmas baubles
- Wool or twine in your colour choice
- Ribbon
- Scissors
- Hot glue gun
Directions:
- Remove the hanging clip from the Christmas bauble
- Start gluing your wool or twine from the top of the bauble and make your way to the bottom. Be careful not to burn yourself while doing this step
- Reattach the hanging clip
- Cut the string that was on the hanging clip and replace it with ribbon
DOILY CANDLE VOTIVES
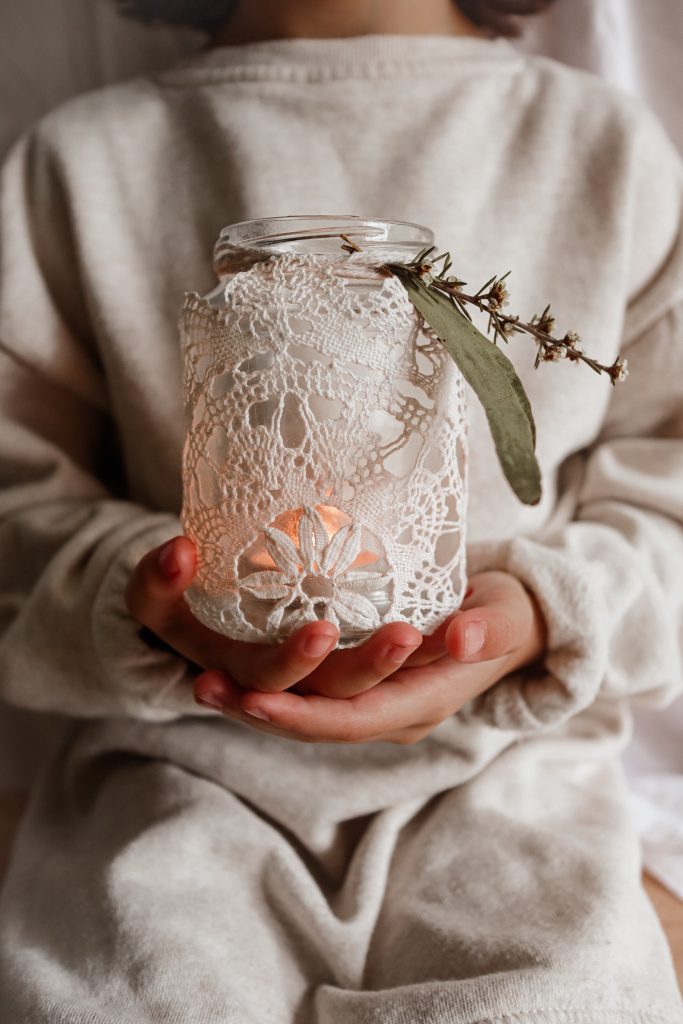
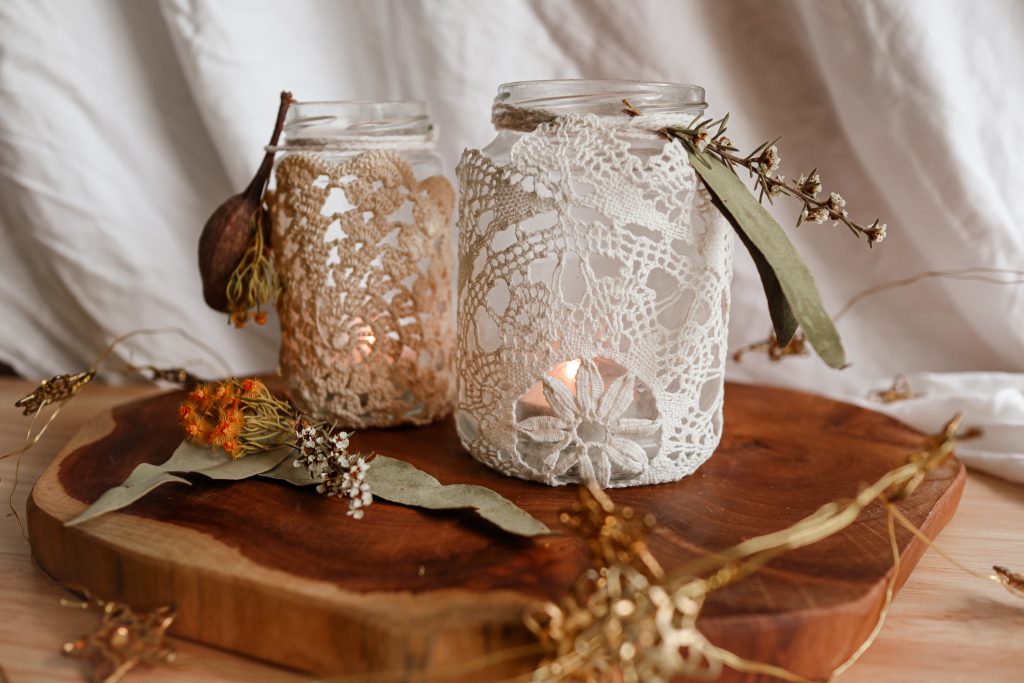
What you’ll need:
- Empty jar (I used coffee jars)
- Doilies
- Modge Podge
- Tealight candles
- Decorative items- leaves, flowers, gumnuts etc.
Directions:
- Cover the outside of a jar with Modge Podge
- Place your doily around jar (it may not wrap all the way around) and allow to dry
- Wrap cord around the neck of the jar and tie it at the back.
- Slip your decorative items between the cord and jar to secure them in place.
- Place a tealight candle inside and light.
WALL HANGING


What you’ll need:
- A long branch that you have cleaned off
- 5 – 10 pinecones
- 7-10 dried bunches of flowers or hydrangeas
- Twine
- Scissors
Directions:
- Lay everything out on a table or large working surface, it is easier to arrange everything flat and then hang
- Fasten twine around pinecone stub and flower stems
- Arrange them on your stick, remember to hang them at different heights
- Hand on the wall and decorate your space
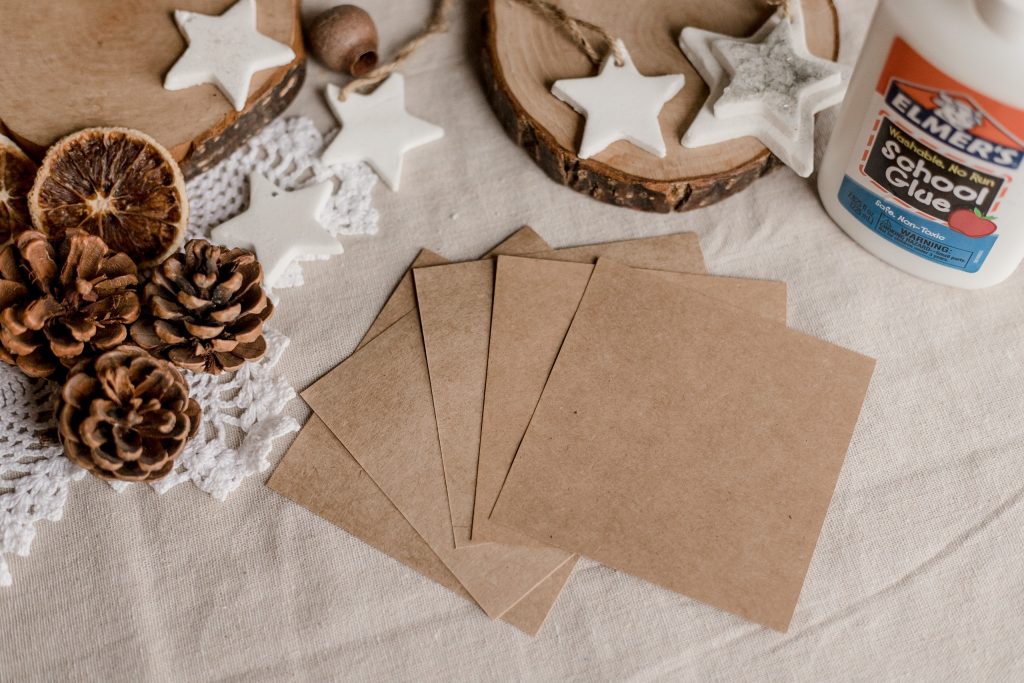
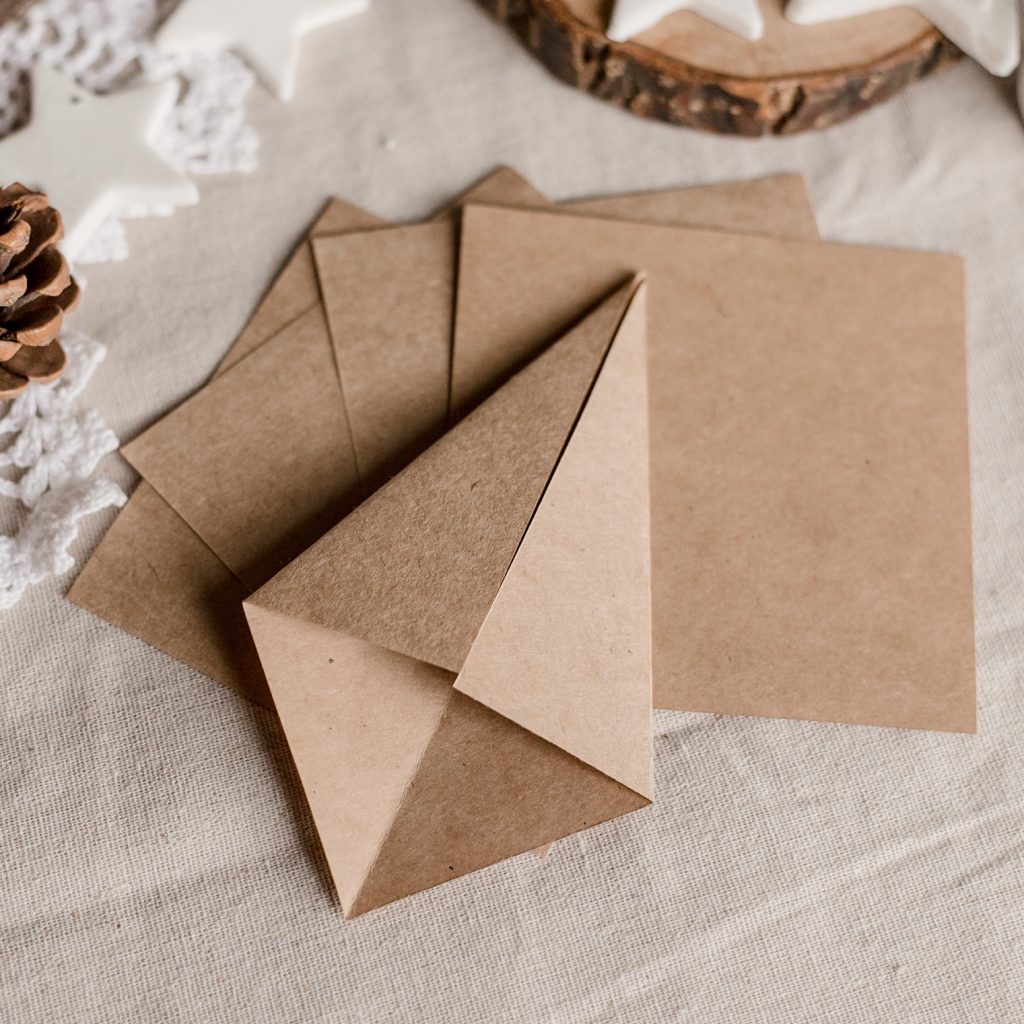
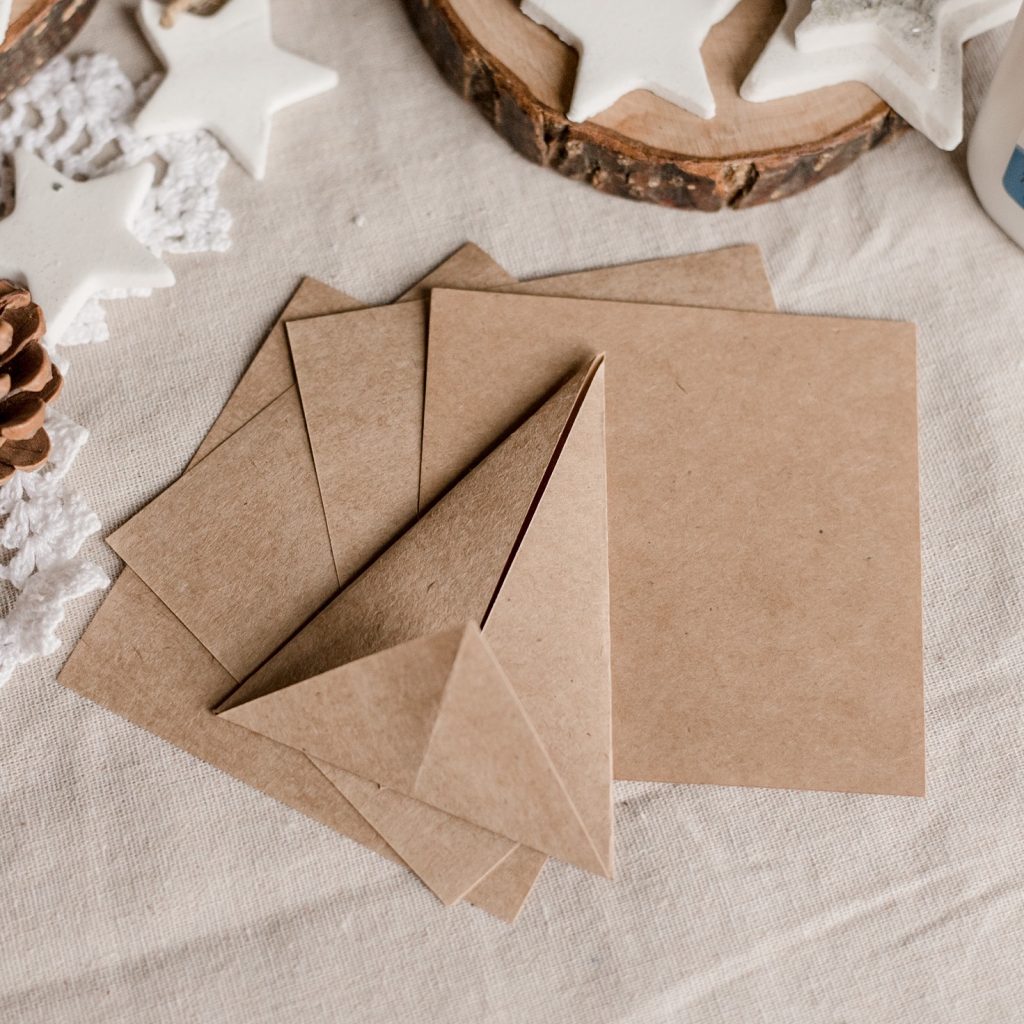
CHRISTMAS STAR
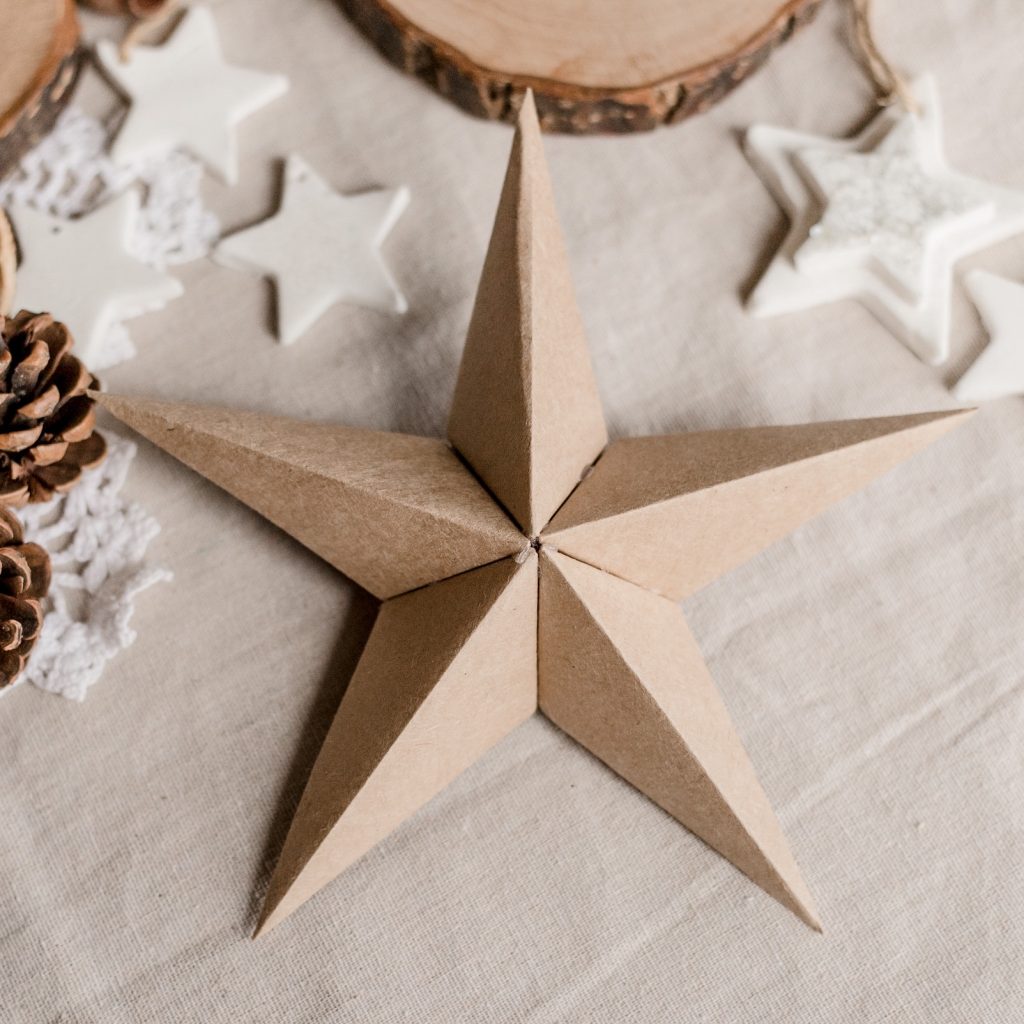
What you’ll need:
- Cardstock
- Glue
- Ruler
- Scissors
Directions:
- Cut 5 squares from your paper. We made ours 10cm square, but you can go bigger if you like
- Fold paper in half from corner to corner to make a triangle
- Unfold paper and fold the top corners into the center
- Fold the bottom over those folds so you now have a triangle shape
- Fold the bottom corners in to meet the middle fold so you have a diamond shape
- Repeat for all 5 pieces of paper
- Glue the base flaps together on the inside but make sure that you don’t glue along the star tip
- Repeat with all 5 pieces again
- Glue the bases together on both outside edges and make sure to line them up
Here is a photo of the steps for reference


NATURE WREATH
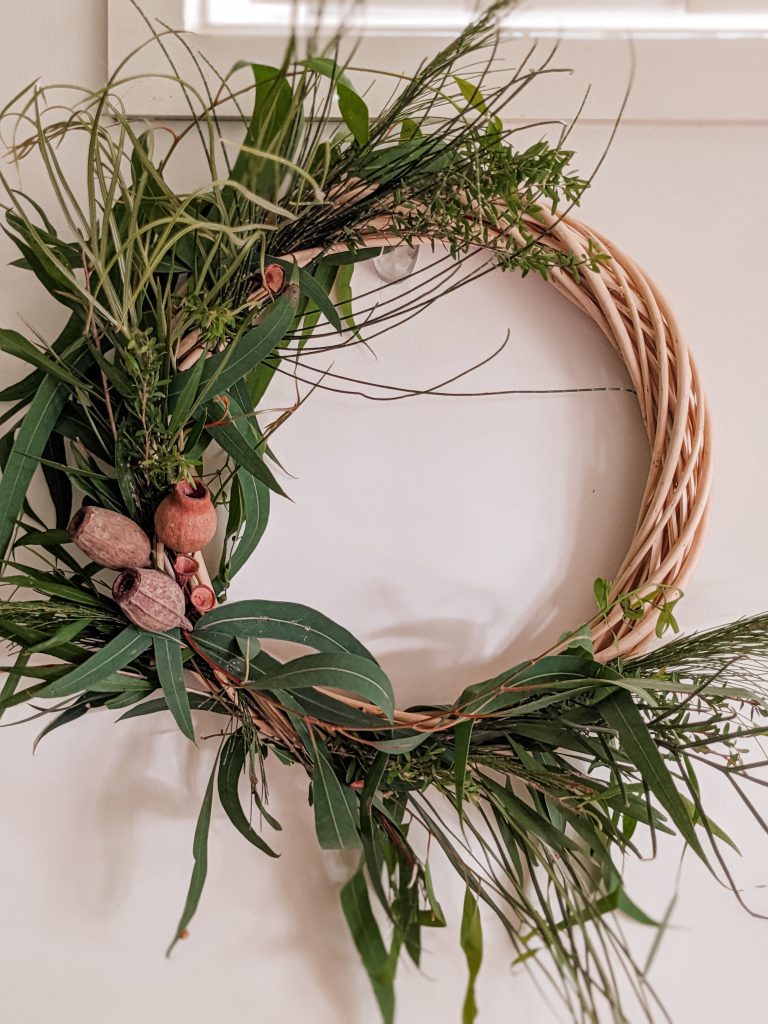

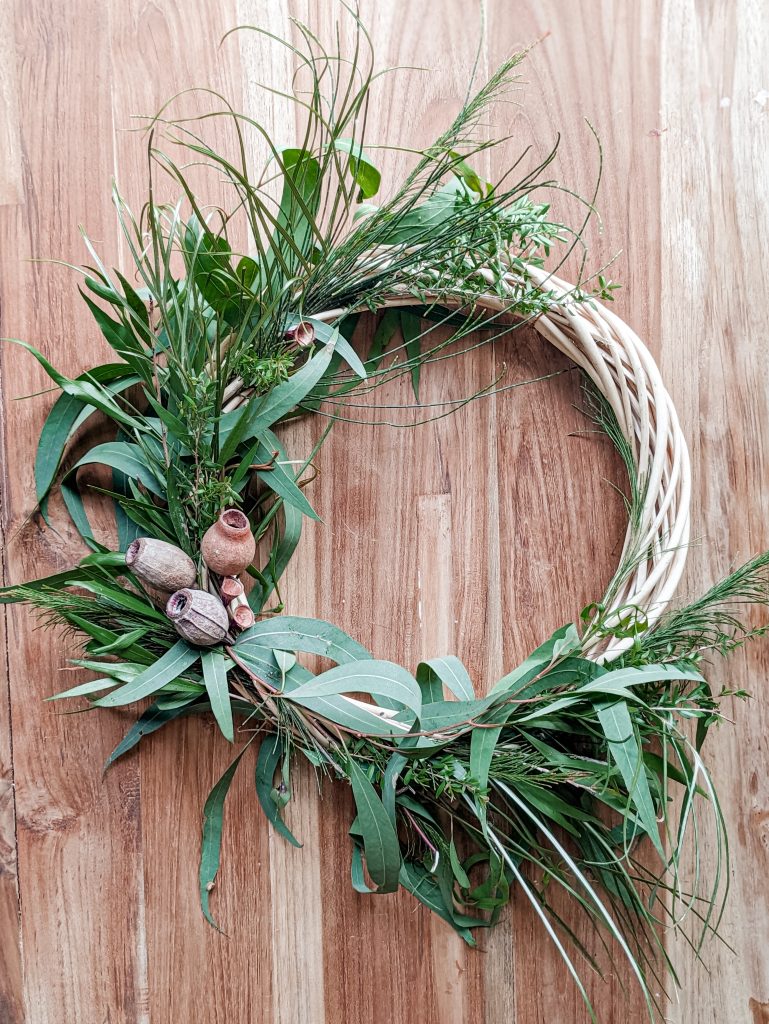
What you’ll need:
- Wreath- either store bought (the one used in the images is from Spotlight) or create your own with vines
- Nature items to decorate- I used assorted leaves and gumnuts. You could also use other seed pods, pine cones, berries and/or dehydrated oranges
Directions:
- Head off on a walk to your nearest park, or if you’re lucky enough, take a stroll around your backyard and forage your nature items
- Take your wreath and, using the naturally created gaps, poke your nature items in between to secure. If too loose, use some fine wire to fasten
- Attach twine to the top to assist with hanging if needed
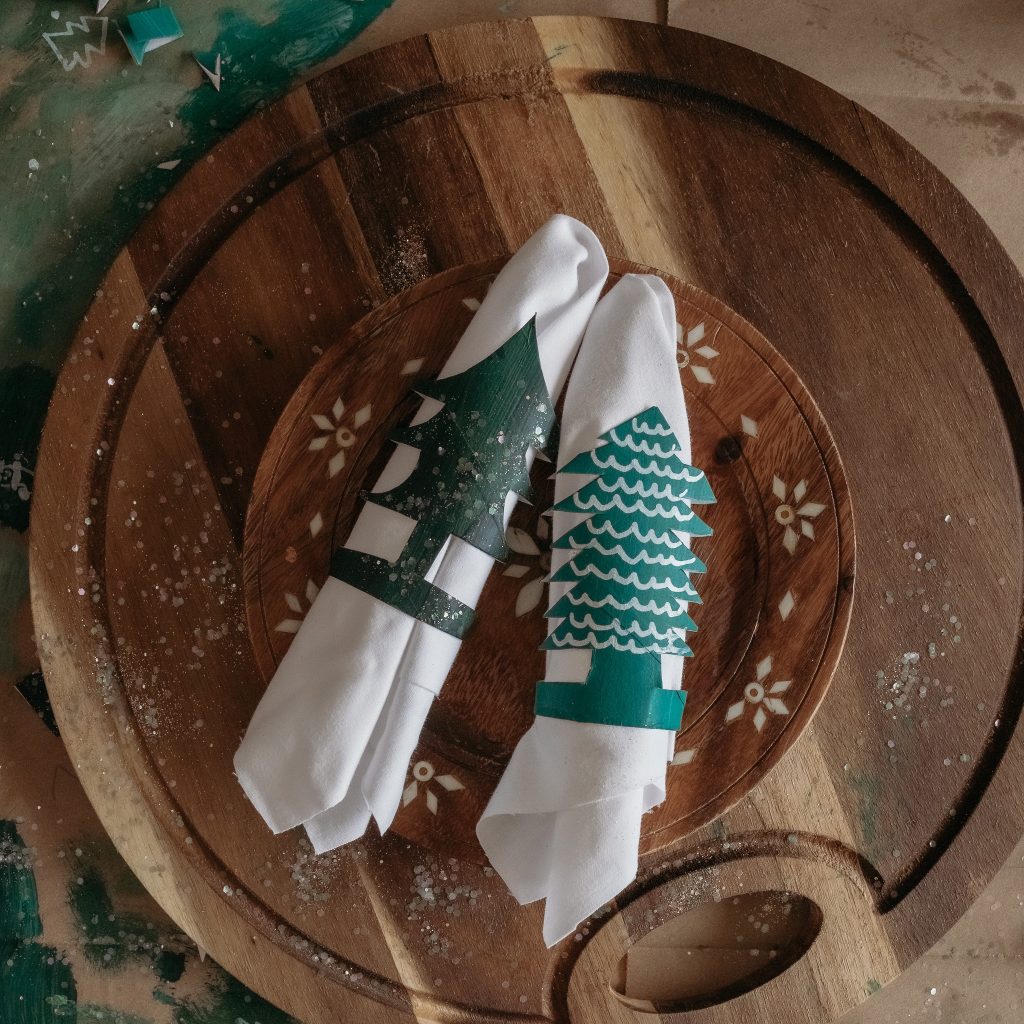
CHRISTMAS TREE NAPKIN RINGS
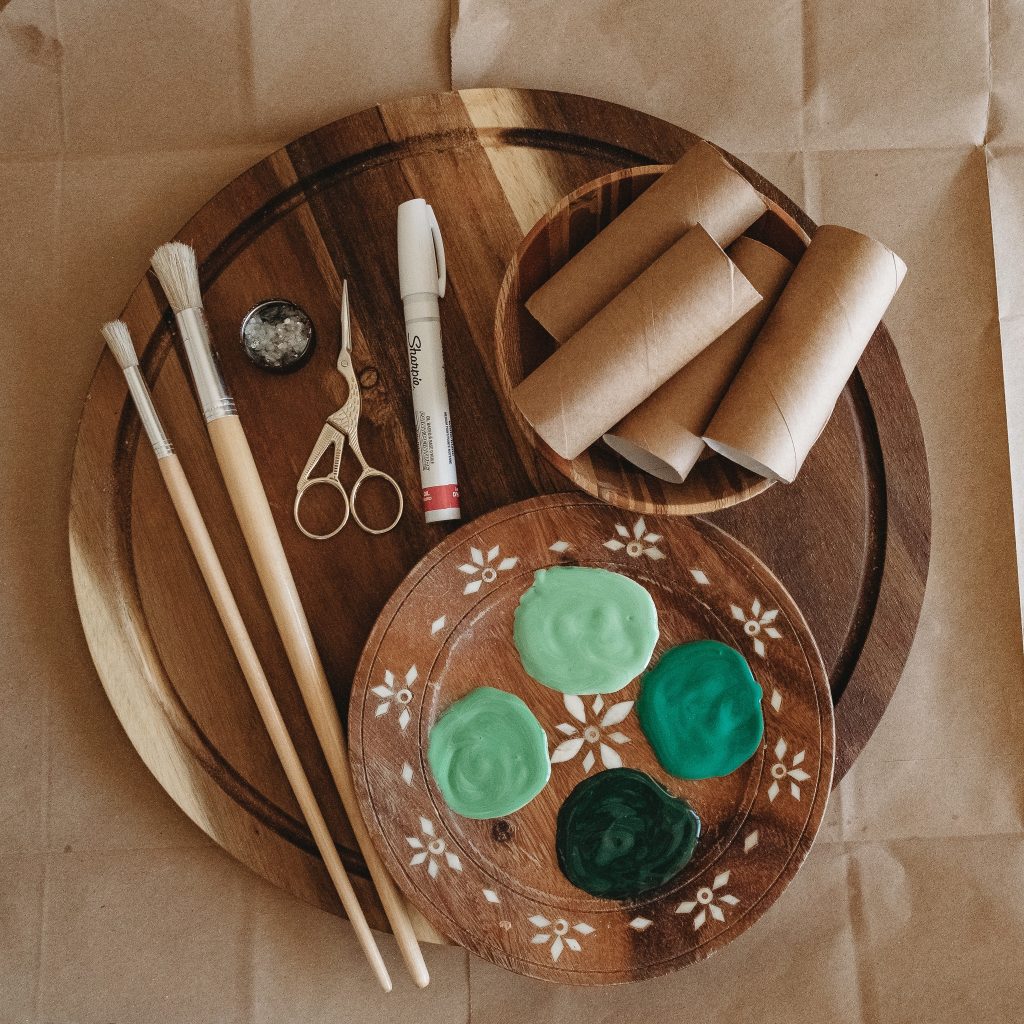

What you’ll need:
- Enough toilet rolls for all your guests
- Green paint (white and black paint if you want to make different shades)
- Bio glitter
- Paint brushes
- Grey lead pencil
- Scissors
- White paint pen
Directions:
- Start by painting your toilet rolls green and sprinkling on glitter
- Once they are dried flatten and draw your Christmas tree shape making sure it reached from side to side so your branches stay attached the whole way round
- Cut out your trees
- Add details with your white paint pen
- Place over napkins to decorate your table
CHRISTMAS HOUSE

What you’ll need:
- Popsicle/craft sticks. We used large and medium craft sticks
- Glue
- Stanley knife
- Watercolour paint or tea/coffee
- Ruler
- Paper
- Cardboard
Directions:
- Start by drawing a house design in the size you’d like your house to be. We measured the height by the width of 9 craft sticks
- Once you’ve decided on the size start cutting the rounded edges off the craft sticks
- The back and sides are super easy and you can lay your pieces out and glue them by securing craft sticks in the opposite direction
- The front wall with the windows is best made by piecing everything together and gluing it. Then work out where the door and windows will go. Once you’ve got that sorted you can cut them out once the glue is dry
- Secure all the wall together with vertical craft sticks and glue
- For the roof we used a piece of folded cardboard to fit and glued some craft sticks on top. We didn’t attach the roof/cardboard until it was dry
- Paint or stain your house
We made some little curtains from leftover fabric scraps. We also made a wreath out of embroidery floss- just a 3 strand braid and some knotted embroidery floss berries/flowers. Lastly, we decorated with homemade snow.
DRIED ORANGE NAME TAGS
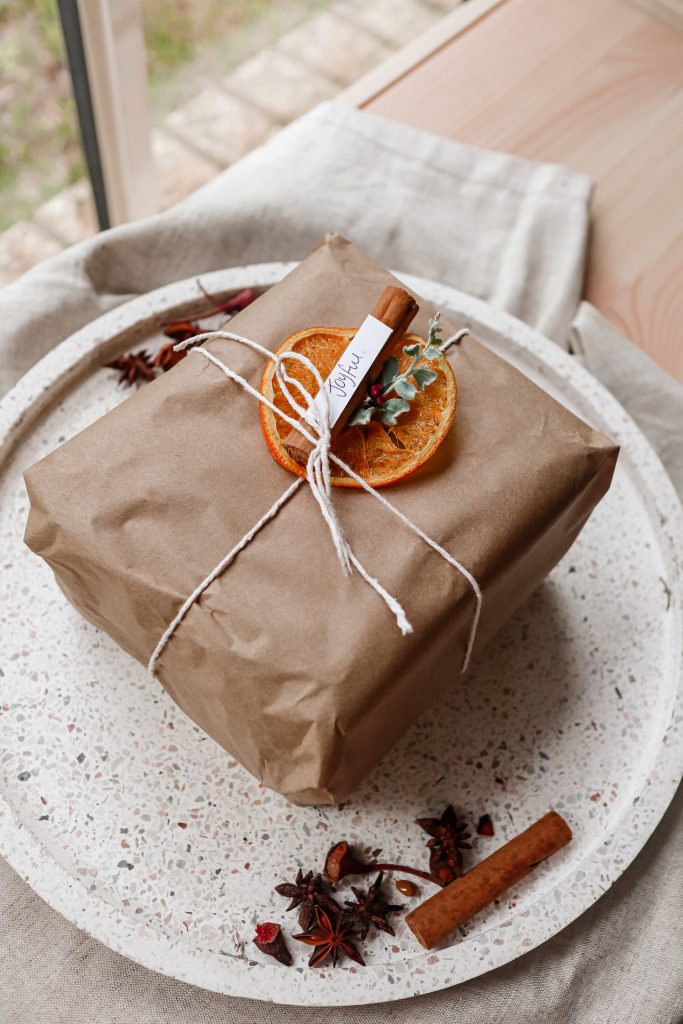

What you’ll need:
- Oranges
- Items to decorate ( I used star anise, cinnamon sticks, gumnuts, flowers & wattle leaves)
- Hot glue gun
- Paper and pen
Directions:
- Cut your oranges into thin slices and place on a tray
- Dehydrate your oranges in an oven – 70 degrees for approx 4 hours
- Decorate the orange slices using an assortment of items and hot glue into place
- Cut small thin strips out of the paper and write names on them
- Attach to the orange tags and get ready for the lucky recipients to be wowed
Here’s some fun facts about Sarika and Sage!
- Our products are locally made in Victoria, Australia
- Our eco-friendly mission is to make eco-friendly craft and organic products to educate and inspire little minds to care about their environment
- Our products are all made locally in Koo Wee Rup, Victoria.
Follow us on Instagram for more crafty inspo @sarikaandsage
If you like our top 10 Christmas crafts, you might also want to read our previous Christmas blogs- 17 ideas for a crafty christmas and A Crafty Christmas.